A funny thing happened at the end of this build. Once it came time to take photos, my interest in this model fell off a cliff:

Part of it comes down to my decision not to get a sheet of waterslide decals to replace the included stickers. I was afraid that waterslides would be too difficult, on account of just how small they’d be.

And while that may still be true, it’s also true that the default stickers just don’t look good. This is especially true on the chest, which is not only dark blue plastic, but is also curved. The stickers just stick out like a sore thumb, and I think they take a lot away from the overall look of the kit.

The other problem is that the model just doesn’t feel very “poseagenic”.

I don’t what causes this phenomenon, but it’s not the first time it’s happened to me. Certain models just have that “it” factor that make them ooze personality no matter what they’re doing, but the Crossbone just doesn’t have that. At least, not to my eye.
As a result, I didn’t end up taking nearly as many photos as I expected to.
But before we get to that, let’s do some size comparisons. As a miniature mobile suit, you’d expect the Crossbone to be the same size as the Victory Gundam, and sure enough, it is!

You’d also expect it to match its older sibling the F91. I gave my HG F91 to my kids to play with, and while they did some damage to it, I can at least get it to stand for a comparison shot:

So the scale is correct. Not a surprise, really, but it’s good to know. Now we move onto some poses.
Here’s the Crossbone with its weapons holstered on its hips:

It’s a cute idea, but because the weapons are so big, they look a bit cartoonis when attached to the body.
But then when you put the pistol in hand, it looks too small:


Am I just being too picky?

As for the sword, I think it looks fantastic, but I just couldn’t nail the right pose:


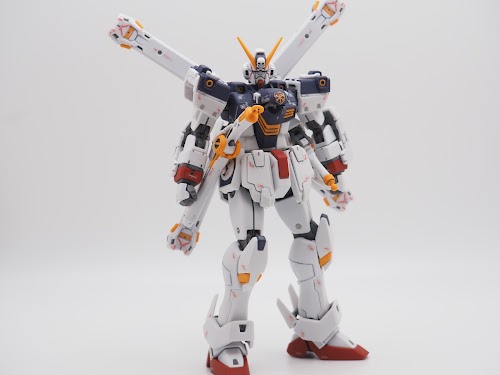
One thing that’s worth pointing out is that the X-shaped thrusters move around a lot. Keeping them in place and angled the way you want is job in and of itself.

The fact that the knife handles are stored in the back of the legs is a cool little gimmick, but when equipped, they don’t exactly look intimidating:


Of course, we can also stick the knife into the foot, which also doesn’t look nearly as cool as I expected:


Now for the Zanbuster. This is exactly the point where my motivation began to crater, so I don’t have that many shots, despite the fact that this is technically the model’s main beam rifle:

Now for the Scissor Anchors:

I’ve had a lot of models with some sort of wired-based weapon, but this is the first one in which the wire - or in this case the chain - is not meant to be bent or curved. I guess that kind of makes sense, but it also doesn’t make for an exciting pose.

Let’s move on to the beam effect parts. To use them, we flip the wrist armor forward to cover the fist:

All of the parts will plug into those little holes in the armor.
Here is the shield:

Which … doesn’t look that much like a shield, but I guess it works.

And now for the brand markers:


I’m starting to get the impression that a lot of the Crossbone Gundam’s gimmicks work way better on the illustrated page than they do in real 3d space.
And now we wrap it up with the cloak:

Fun fact - the four parts the make up the cloak are not really interchangeable. There’s nothing stopping you from swapping them, but they just won’t like quite right if you do.


Conclusion

Folks, I don’t know what more to say. I’m not happy that this build felt so underwhelming, but that’s where I’m at. It’s like the polar opposite of the Full Armor Gundam 7th, which looked cool no matter what it did (even with a gimpy foot).
Ah well. It’s best not to dwell on it. Time to put this on the shelf and move on to the next build.